Prior to 2024-2025 Ed-Fi API
The following TSDS Interchange files are required for ECDS:
- Interchange Education Organization Extension – SIS
- Interchange Master Schedule Extension – SIS
- Interchange Student Parent Extension – SIS
- Interchange Student Enrollment Extension – SIS
- Interchange Student Program Extension – SIS (PK only)
- Interchange Staff Association Extension – SIS
- Interchange Assessment Metadata – from TSDS eDM/batch
- Interchange Student Assessment – from TSDS eDM/batch
- Interchange Student Cohort – SIS (PK only)
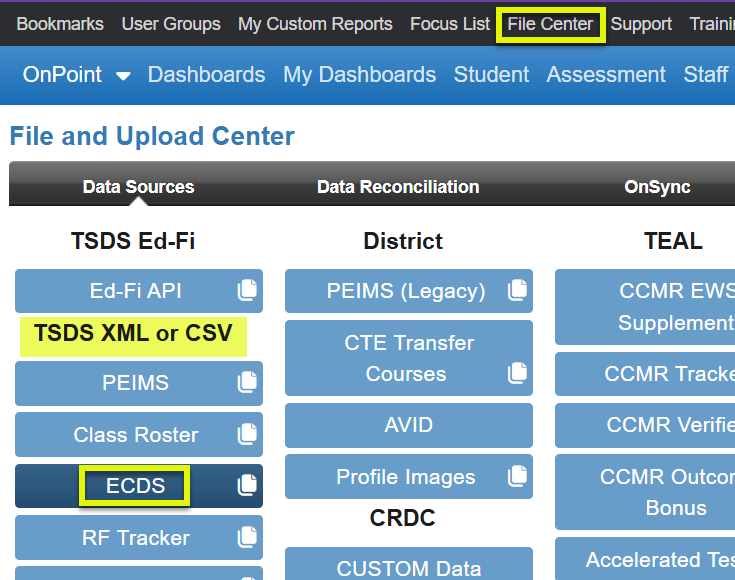
To UPLOAD all interchange files into the File Center>TSDS XML or CSV>ECDS tab:
- ALL files for the ECDS submission listed at the top of this article need to be loaded at one time since it is a wipe and replace every time a new load is initiated.
- Interchange files can be zipped or unzipped – Do not mix
- Note: If zipping interchanges, ensure that the full complete set of all interchanges is in a single zipped file, not multiple zipped files.
- Order of the files do not matter
- Note: Multiple files of the same interchange, for example, Interchange Education Organization Extension-one from business side and one from student side, can be loaded at the same time. The system will take the first one. Exception is the Staff Association Extension which will allow one from business and one from student as long as the staff are unique on each one.
- Click on the green upload button to browse to the interchanges.
- The file type when browsing should be “All Files”-bottom right

- Select file(s) and click “Open”
- Files will be sent to OnDataSuite.
- Use drop down to select Year and Submission – KG or PK
- Click the green ‘Start Upload’ button
- When data load is complete scroll down to view all the file load.
- Click on the Info link, right, to see process information including interchange files loaded.
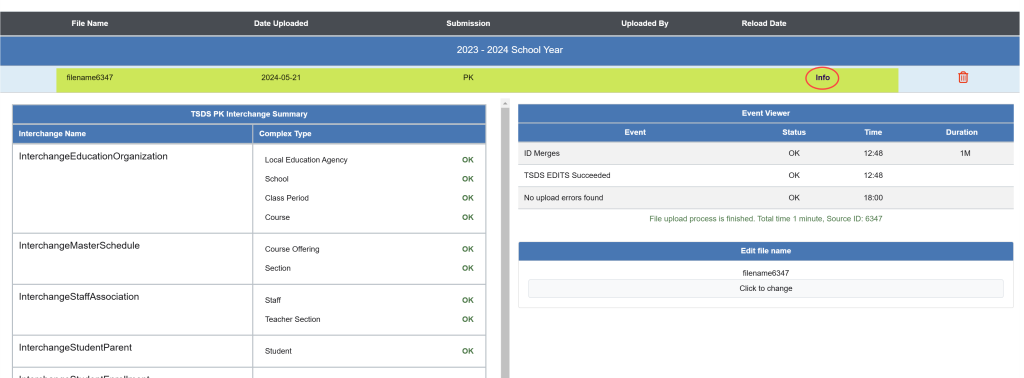
Best Practice: Verify all interchange files sections loaded OK. If not, recognize the missing data may affect certain reports requiring the associated data.