The File Center within OnDataSuite (ODS) is its own ecosystem. OnDataSuite is a relational database and each blue box is an opportunity to add data that can be tied together (related) to help tell the data story of your district.
Each area holds an important piece of that story. For each blue box that has data loaded, you will notice a paper icon on the right hand side of that box. The more paper icons, the deeper the story details.
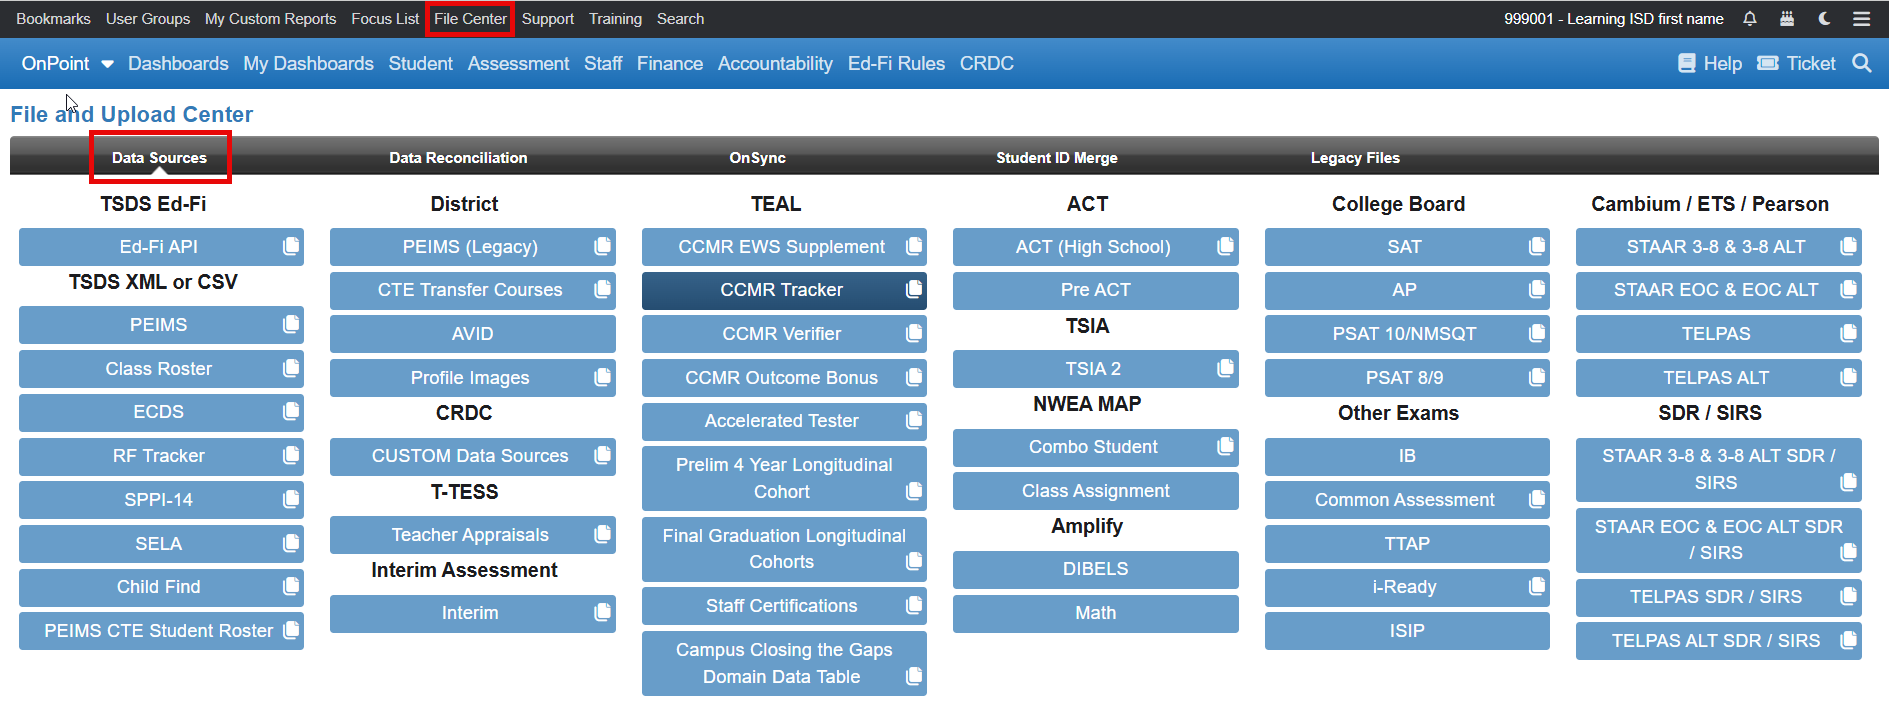
We have a saying at OnDataSuite, “All Roads Lead Thru PEIMS.” Your data story for each school year begins with all of the pieces of your PEIMS data. As you progress through the year and as we move from the left side of the file center over to the right side, you are adding additional data pieces to paint that richer data story.
Identify the individuals in your district that support each piece of data (blue box).
- Individual must have access to the source of the data. For example, to download Cohort data from TEA, a TEAL account with Accountability access within TEA is required.
- Click on each blue box and navigate to the hyperlink below the boxes and click on the “Click here for instructions and specifications, prior to loading this file” hyperlink. A knowledge base (KB) article will appear identifying the source of the data and any other relevant information required to successfully upload the information into ODS.
Some data sources load automatically once set up is complete.
- TSDS Ed-Fi – set up is once a year for the current school year. Data flows from TEA once the district is sending data nightly to TEA via the student information system and business system utilized by the district. OnDataSuite pulls the district data from the TEA IODS (Individual Operational Data Store) for each district based on a schedule established by the district.
- For more information: TEA Ed-Fi IODS Connection
- OnSync – navigate within the File Center to the OnSync tab within the black menu bar. Make sure the following options are setup and flowing data as applicable.
- OnSync for College Board
- OnSync for Accuplacer/TSIA2
- OnSync for i-Ready
When should I upload data?
- Use this guide document to assist you. Suggested Assessment & Accountability File Center Upload Calendar Dates
- Downloadable spreadsheet to help you keep track: https://bit.ly/ODSPathwaystoSuccess
What am I missing?
- EXPLORE the database.
- Venture under the blue menu tabs to the different areas of ODS. (Student, Staff, Finance, Assessments, Accountability)
- Click to run reports.
- Use “Tools” (upper right hand corner of every report) to view the Report Info.
- Utilize the Report Center (Student, Staff, Finance – left hand side of screen) to write your own queries.
- Choose from the list of data pieces along the left hand side
- Choose date range for data
- Add criteria to search the data
- Use filters on each criteria to drill further into a particular area
- Click CREATE
- Data cannot be deleted or scrambled by users running reports or creating queries. Don’t be afraid to play around in the system.
- ATTEND training sessions.