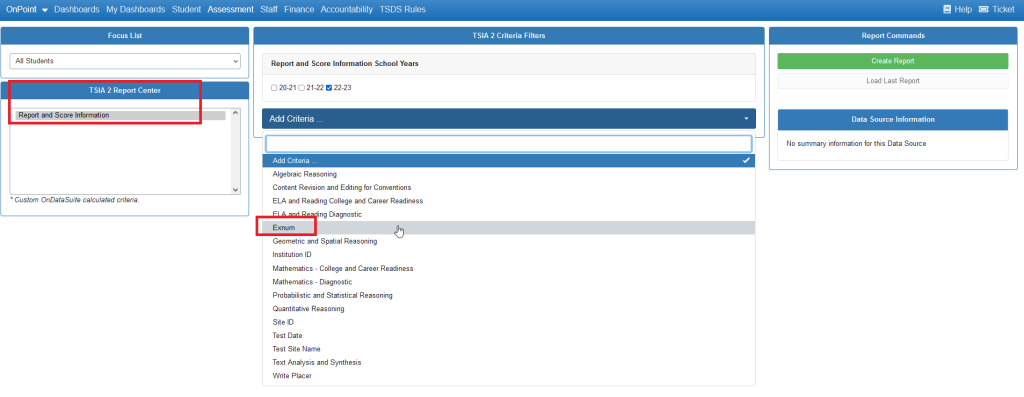
10/23/2023 – Note: We have added the ‘ExNum‘ value to the end of the OnSync import of this file. This value will now automatically be imported from this point forward and can be reviewed under the Assessment/TSIA2 report center by adding the Exnum column as shown in the image below.
Users who create their own file will need to add this field manually to the end of the file as explained in the Option 2 section of this article.
Option 1 – OnSync – Preferred Method
Users can opt to automatically have their Accuplacer TSIA2 files pulled nightly into OnDataSuite using the OnSync method. Please follow the link below for more information on how to set this up.
https://kb.ondatasuite.com/knowledge-base/loading-tsia-accuplacer-files/
Option 2 – Manual Creation of Accuplacer TSIA2 File
TSIA2 Accuplacer- Accepted Data File Layout
This file is an Comma Separated Value format (.CSV)
Users who choose not to use the OnSync method for Accuplacer TSIA2 file upload will need to follow the directions below to create their own file for upload. It is highly recommended that you watch the instructional video under the OnDataSuite support page PRIOR to uploading your file to ensure that it has been created in the exact way necessary.
YOU MUST BUILD YOUR FILE EXACTLY AS SPECIFIED IN THIS SECTION OR THE FILE WILL NOT LOAD CORRECTLY.
TSIA2 OnDataSuite Import Template 2023
You must build your file EXACTLY as specified in this section or the file will not load correctly. Users should use the CSV template provided below to ensure that their file headers are in the correct order and have the required number of columns PRIOR to uploading into the file center.
Building your TSIA2 Accuplacer data file – Step by Step Video Instructions
To view a step by step video of how to build the TSIA2 file for import into OnDataSuite please log into your OnDataSuite account and go under the Support / Training / Training Videos section.
Where to load your TSIA2 Accuplacer File
The TSIA2 data file should be loaded into your file center under the TSIA2 location.
TSIA2 (Accuplacer)
File cannot be compressed or zipped
This file is a fixed length file provided by College Board. (CSV)
File name must contain no spaces
When naming files, only use letters, numbers, dashes or underscores
We strongly recommend Google Chrome or Mozilla Firefox while using OnDataSuite products
Where to get your TSIA2 Accuplacer data
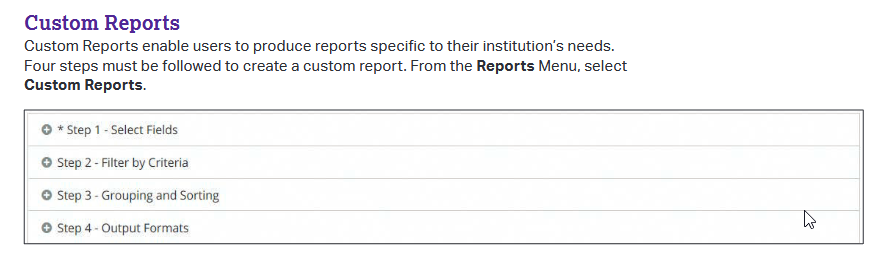
The TSIA2 data fields required for upload into the OnDataSuite file center are derived from the College Board online reporting portal. You must have a College Board user account that allows you to build and pull reports from the Reports/Custom Report section as shown in the image below.
Building your TSIA2 Accuplacer data file – Step by Step Instructions
The following step by step instructions will show you how to build your TSIA2 Accuplacer data file. You MUST build your file using the custom report method as outlined below because it is the only option that will include the associated fields when it is created
- Text Analysis and Synthesis
- Content Revision and Editing for Conventions
- Quantitative Reasoning
- Algebraic Reasoning
- Geometric and Spatial Reasoning
- Probabilistic and Statistical Reasoning
Open your College Board Accuplacer report center. From the reports menu and follow the steps listed below
Step 1. Select fields for Report
This process will require that you pull different fields from different Field Categories available in the TSIA2 report builder.
Step 1 (A) Start by selecting ‘Basic Information’ from the Field Categories drop down
Click on the ‘Available Fields’ and use the right arrow to move each item over to the ‘Selected Fields’ box and the order as follows:
Test Start
Last Name
First Name
Middle Initial
Student ID
Birth Date
Site ID
Inst ID
Site Name

Step 1 (B) Next select ‘Test Scores’ from the Field Categories drop down
Continue to click on the ‘Available Fields’ and use the right arrow to move each item over to the ‘Selected Fields’ box and the order as follows:
***TSIA2 Mathematics College and Career Readiness
***TSIA2 Mathematics Diagnostics
***TSIA2 English Language Arts and Reading College and Career Readiness
***TSIA2 English Language Arts and Reading Diagnostics
TSIA2 WritePlacer

Step 1 (C) Added 10/23 – OPTIONAL (Example image not included below) – Users may opt to include the selection of ‘ExNum’ from the Field Categories drop down and add the field to the very end of the file. (see step 5 below for example of where the field needs to be placed)
Step 2. Filter by Criteria
Please check that your date range selection is accurately reflecting the date range you are looking for.

Step 3. Grouping and Sorting
Please skip this step in the creation of your file
Step 4. Output Format Settings
Set up the way you would like your file to be formatted as follows:
Include header in output file? YES
Date Format: (MM/DD/YYYY)
Text Delimited: Comma
File Formats: Windows
Download Format: CSV
Make available for Web Services? (Either is fine)
Save Query: After you build this report you can opt to save this query and you will not have to build it again, and it will be available from your drop down options. It may require that you update the date ranges when using this so please make sure to confirm before running.
Step 4 (A) SAVE your query and you will not have to build it again. You will have to check the associated dates each time.
Step 4 (B) SUBMIT – You will need to hit the submit button at the bottom of this report and it will generate your file to save locally.

Step 4 (C) You will need to download the file locally by clicking the download button that appears after your report has been run.

Step 5 REQUIRED. Opening File & Arranging Fields
You will need to open the file and arrange the fields in the order shown below. Due to the fact that reports derived from within the College Board report building tool can vary from user to user and are not created to follow a specific output data file format in their creation, each user uploading TSIA2 data into the file center must export their report in the College Board reporting tool to contain ONLY the following fields in the EXACT ORDER displayed below with the correct field names.
OnDataSuite Accepted TSIA2 Data File Format – All fields MUST be in the EXACT order listed below and should contain all header values even if they are not used.
TSIA2 Header Template
In most cases you should be able to arrange your new file in the order listed above and save as a CSV but if you are having issues please feel free to use the attached CSV formatted header to build your file.
Related Support Articles:
Checking for errors in uploaded TSIA files
Read this article to double check that your files loaded properly
https://kb.ondatasuite.com/knowledge-base/accuplacer-and-tsia2-checking-for-errors-and-removing-files-with-errors/
Procedures for Importing TSIA2 Records for Out-of-District Students
When a student has not previously tested within your district, their records may be inaccessible through the standard TSIA2 Accuplacer system. Consequently, the student record will be unavailable via OnSync (Option 1) or Manual Record Creation (Option 2).
To incorporate these TSIA2 scores into the OnDataSuite File Center, districts may utilize one of the following methods:
- CCMR EWS Supplement Upload (Recommended): Since the OnDataSuite File Center is designed to support only original source files, this method creates a “placeholder” within the CCMR Early Warning System calculations. Please note that while this satisfies reporting requirements, the data will not populate in the individual student dashboard results.
If this method is used, any results later uploaded for the student will replace this value in all associated calculated reports.
For details on this upload please visit: https://kb.ondatasuite.com/knowledge-base/ccmr-ews-supplement-files/ - Manual Excel Template (Not Recommended): Districts may use the provided Option 2 Excel Template to generate a student data file. However, this method is discouraged as it lacks an automated control mechanism to verify the accuracy of the student records and scores. If choosing this method, you must strictly adhere to the formatting specifications outlined on this page to ensure a successful upload.