These references apply to 2023-2024 and earlier PEIMS XML submissions.
2024-2025 and beyond has transitioned to Ed-Fi API Connections and Submission Promotions.
Use the Loading 2024/2025 CSV and Beyond for 25/26 accountability
NOTE: Training video posted below.
- Use Chrome as your browser when loading files.
- Format = XML (preferred) or CSV. Note that CSV files can be loaded for Ed-Fi years and they will stop promotions on applicable submissions on the TEA Ed-Fi iODS Connection screen so that the CSV files don’t get overridden. Loading CSV files 2024-2025 and Beyond
- Files can be loaded either zipped or unzipped.
- If zipped, ensure interchanges are directly in the zipped file and not in a parent folder within the zipped file.
- If unzipped, multi select all the xml files to be loaded. The order does not matter.
- NOTE: Use 7-zip files (.zip), not .7z
- NOTE: When using a different SIS than Business Information System:
- Opt 1- put all unzipped files from both systems in a folder and upload them all at once. OnDataSuite will merge the data together.
- Opt 2 – merge together using SIS or Bus Software then extract into TSDS interchange files (zipped or unzipped).
Uploading TSDS PEIMS files into OnDataSuite
- Once files have been either extracted from the SIS (BIS) or retrieved from TSDS, use the following steps to upload into OnDataSuite.
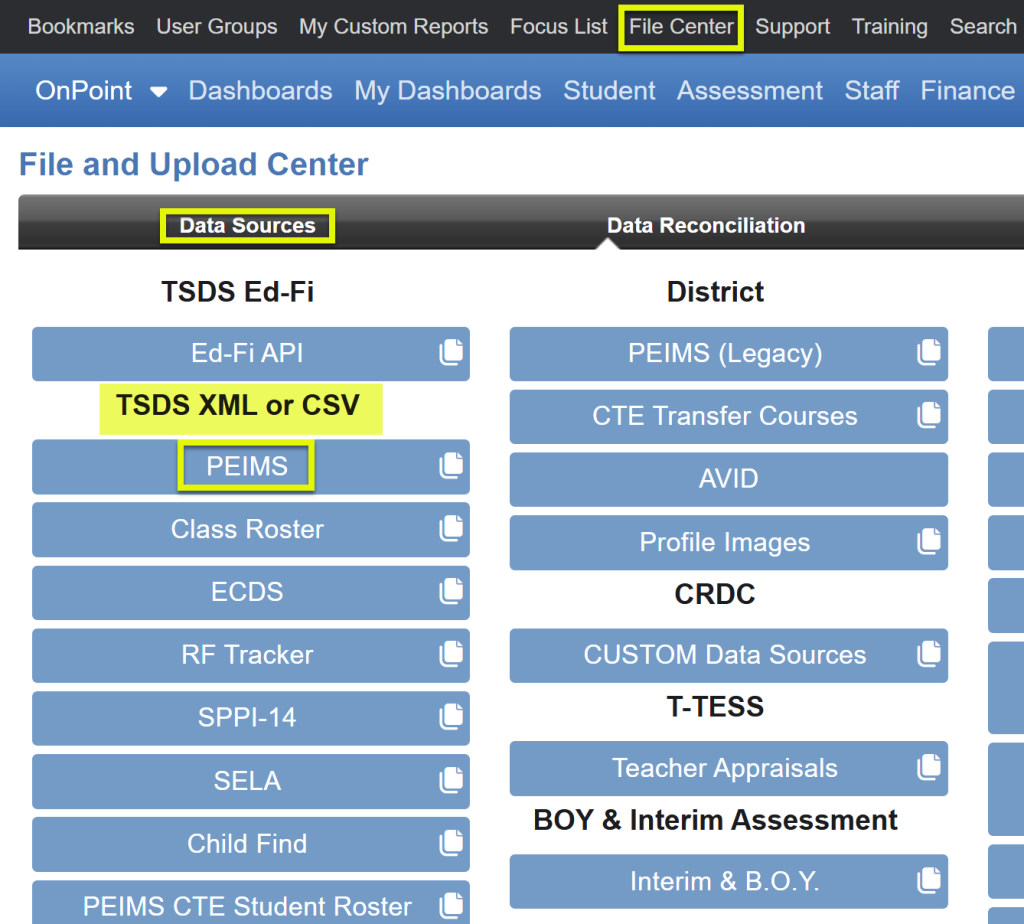
- Log into OnDataSuite, go to File Center>Data Sources>TSDS
- Select the blue PEIMS tab.
- Use the green Click to upload PEIMS files button to browse to zipped or unzipped xml or csv files (order does not matter).

Notes on Multiple Interchange Files:
- PEIMS Interchange loads are a wipe and replace. If you load SIS files and then load BIS files, it will not retain both sets of interchanges but rather wipes and replaces with most recent load. You must load both the SIS and BIS interchanges at the same time if it is desired to see both sets of information in the system.
- Multiple files of the same interchange, for example, Interchange Education Organization Extension-one from business side and one from student side, can be loaded at the same time. The system will take the first one. Exception is the Staff Association Extension which will allow one from business and one from student as long as the staff are unique on each one.
Required Interchange for Any PEIMS Submission:
- InterchangeEducationOrganization
- InterchangeEducationOrgCalendar (Summer Only)
Required Interchanges for PEIMS Fall or Summer Student:
- InterchangeStudent
- InterchangeStudentEnrollment
- InterchangeStudentProgram
Once files have been sent to OnDataSuite:
Review the columns.

Note: Year and Submission columns should automatically populate if using the TSDS naming structure
- Year
- Submission – Fall, Mid Year, Summer, Extended
- Preliminary – Flags the file to remind users that changes are to be expected.
- If unchecked, file will be labeled as “Final”.
- Files can be relabeled after loaded.
- Prelim and/or Final files can be overwritten with subsequent data loads (wipe/replace).
- Rep Period – Available only for Summer files to indicate how many six weeks of data are included in the file. All attendance, discipline, and restraint data in subsequent reporting periods are wiped out if included in the XML attendance file.
- Process – drop down
- Load data and run edits – data will be updated in the database and applied to all reports and the edits.
- Run edits only – data will only be applied to edits portion of the system (no updates to the database).
- Load data only – data will be updated in the database and applied to all reports except for the edits (depending on size of file, could save significant time).
- These processes can be run without files replacing each other.
- They all will be stored in the history area below.
- ‘Run edits only’ files will have an indicator on the far-right hand side labeledEdits
- ‘Load data only’ will have an indicator labeled Data
- Delete – a specific file before processing.
4. Start Upload – Green Tab (or Cancel Upload if necessary)
5. When data load is complete scroll down to view all the files loaded.
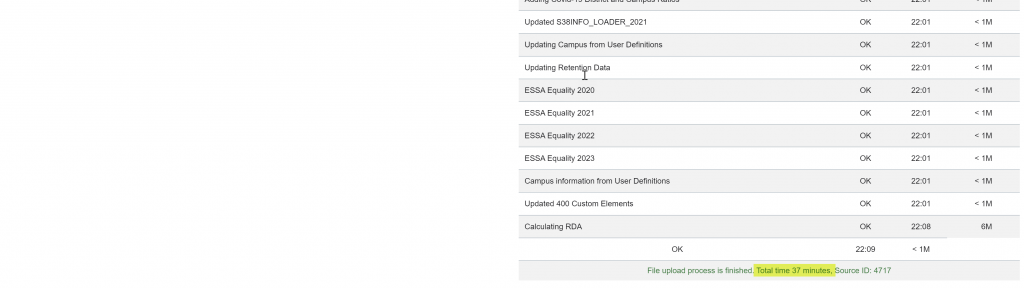
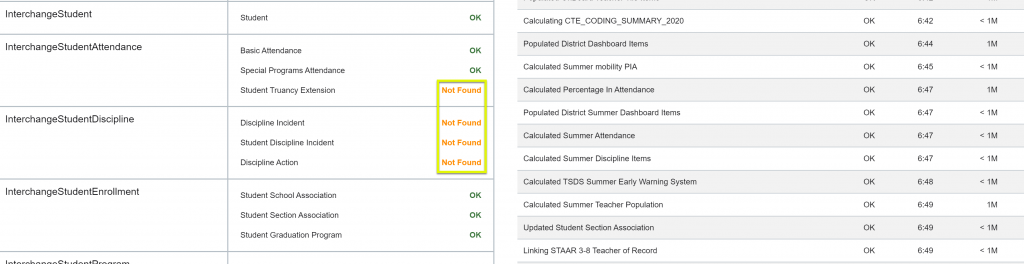
6. Click on the Info (Load data and run edits), Edits (Run edits only), orData (Load data only) link, far right-hand side, to see process information including the Event Viewer showing processes and total time for loading and the File Batch List which displays the interchange files loaded.
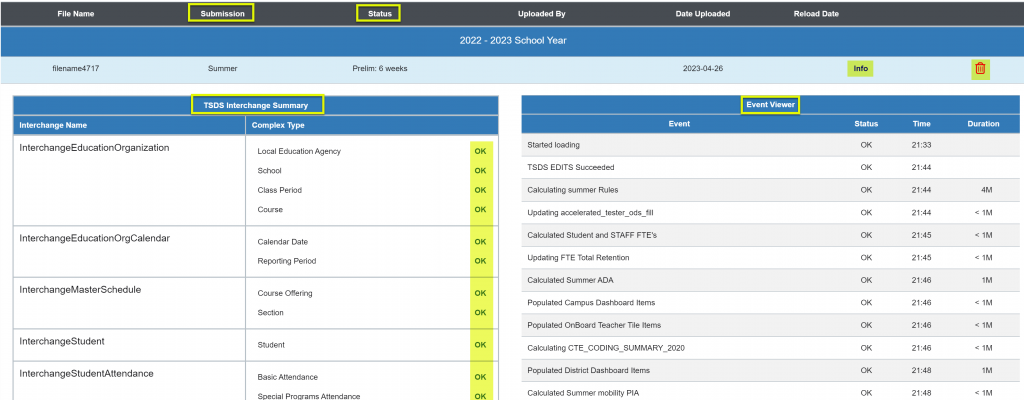
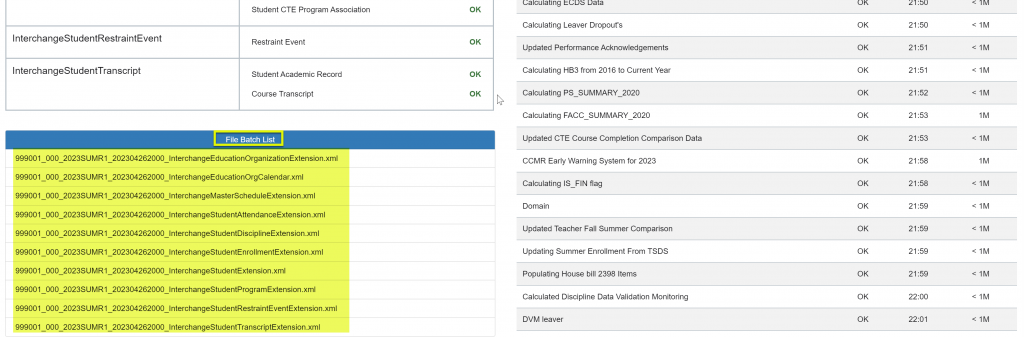
- Missing or erroneous interchanges or complex types (not marked with a greenOK) will affect reports needing data elements from these areas.
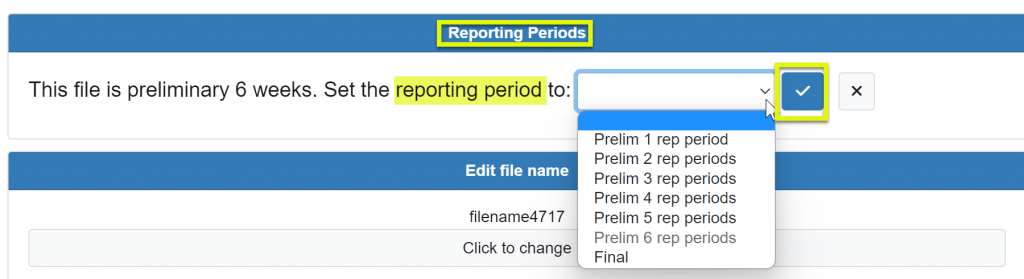
- The Reporting Periods section below the Event Viewer section allows a file status change from preliminary to final or vice versa.
- Note: This is not available if you are running edits only or loading data only.
Fall/Mid Year/Extended
- Only displays Prelim or Final since no reporting periods are involved. The labeling makes no changes to any data in the files; it is for informational purposes only for the end user to see on the Dashboards. Be sure to click on the check mark to make the change.

Summer
- Can change reporting periods if desired. Note that once you change to an earlier reporting period, you cannot reverse and go to a higher reporting period without reloading the interchange files. All attendance, discipline, and restraint information after a specific reporting period will be wiped out once you click the check mark to make the change.
- Edit File Name allows you to change the file name in the upload area.

To delete an uploaded file, click on the trash can, far right side. It will prompt you before deleting.
- Note: This should only be used in rare instances since you can simply load new interchange files for a complete wipe/replace.

Note: While a file is loading, you may start another file upload and/or continue to work throughout the rest of the system.
Video Training/Example: