The custom “Files Loaded by Year” reports in OnDataSuite show districts a total count of records uploaded to a specific file center. It also displays the year each file is connected to during the upload. Since some files may appear to be linked to a certain year based on their format, but actually contain data from a different year, this report helps clarify which year the uploaded file is truly associated with.
Report Locations
“Files Loaded by Year” custom reports can be found under the following Assessment Custom Report Centers in OnDataSuite
- SAT
- PSAT 10
- PSAT 8/9
- ACT HS
- TSIA2
How to use the report
When the report runs, it will search through all of our file center uploads and display an aggregate total of uploaded records by year association.
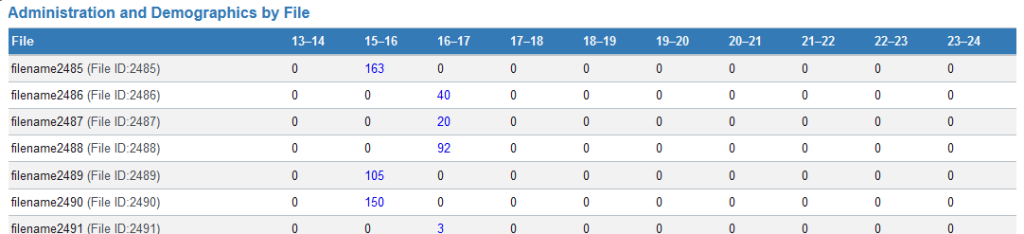
The displayed file name can be associated back to the file center upload location as shown in the image below.
Example: If a file titled (filename2485.txt) was loaded into the SAT file center, and its file format dictated that it be place under the 2016-17 SAT File Layout Year, the report would show a total of 163 students listed under the 15-16 year in the files loaded by year report.
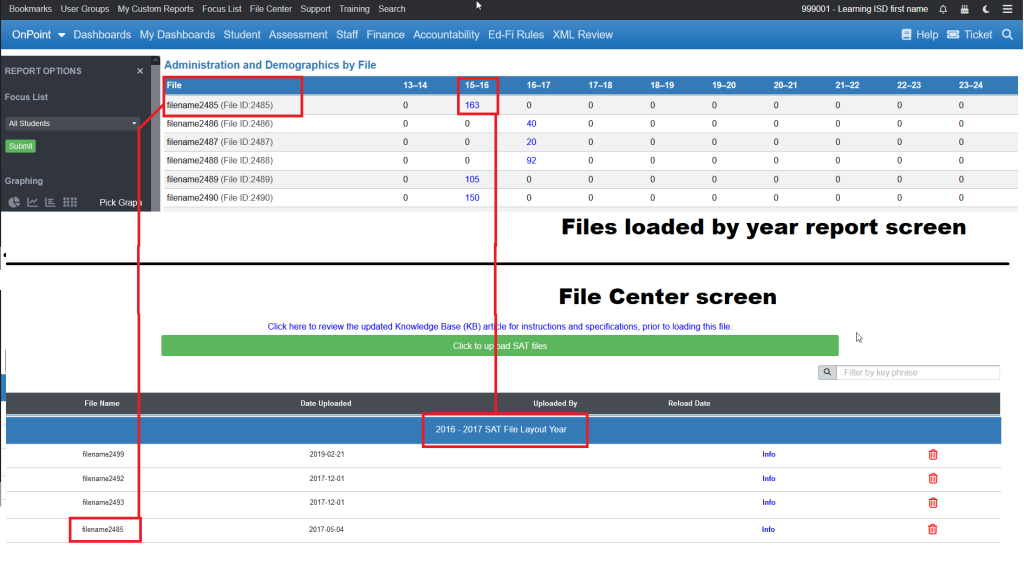
Note that even though the file was loaded into the 2016-17 year which corresponded to the file layout, the year association ties the reported data back to the 15-16 year
Using the Files Loaded by Year report to review/confirm student data has been loaded
To determine if a file has loaded properly it can be helpful to review the data uploaded at the student level. To do this follow the steps outlined below:
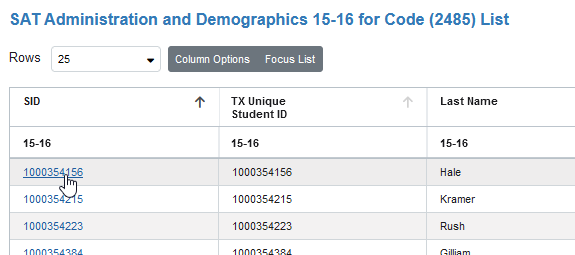
Step 1. Click on the aggregated total in the report to drill down to the student list view

Step 2. Click on the available SID link to drill down to the student dashboard/ student profile views
Step 3. While in the student dashboard locate the associated assessment you are reviewing by selecting it from the student profile side menu bar. In this example, we are looking into SAT file uploads, so we would go into the College Board section and select SAT.
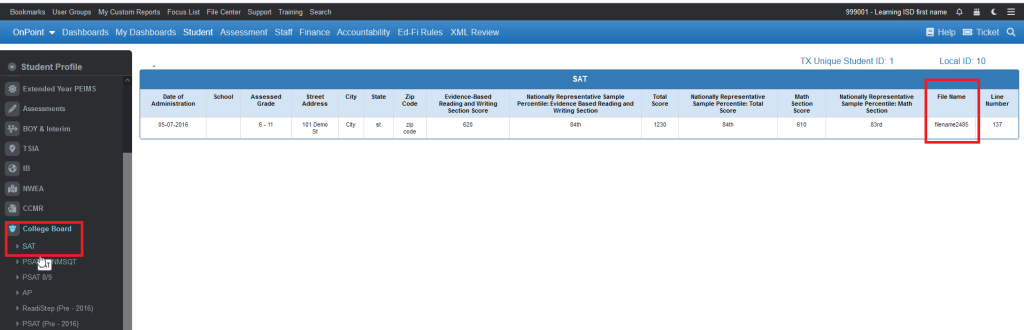
Step 4. Review the data associated with the file in the listed information on the page. Look for any missing or ‘off’ reported values.