Ways to review and confirm that your file was uploaded without errors
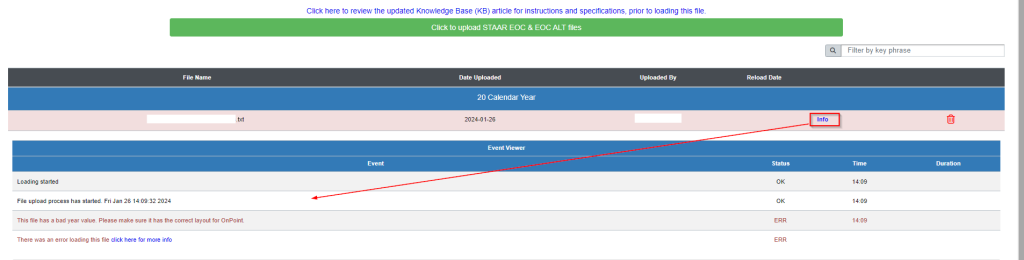
Look for pink highlighted row in file center
After a file has been confirmed as uploaded check the file center upload area and look for anything that is highlighted as pink. This is a sure sign that the file was NOT uploaded properly.
- Use the Info/Data link on the pink file name row for additional details on potentially why the file failed.
- Also verify the Knowledge Base (KB) article instructions on the specific file you are loading to ensure the file is in the correct format. These are linked in the File Center just above the green “Click to upload….” bar for each file.

Check via a report center query
Every file that is uploaded has an area (report center) that allows you to query your data. Once your data file has been uploaded go to that location’s report center. For example, under the Assessment tab, click on the first available line under the report center. When this is done the date ranges of the files you have uploaded should appear to the right. If you see dates that look ‘off’ or are missing, like the example below, then that is a sure sign the file had issues during upload.
Review file in list of uploads
After you load a file into a file center location, scroll down the page and review the year that the file was placed under. If you see a file associated to an awkward year, the file will reviewed outside of your OnDataSuite file center to confirm it is formatted correctly.
Confirm that the file type you loaded was in the accepted format. If the file accepted is a .txt but an .xlsx was loaded, even though the file may have appeared to load, it will not. Also, as a rule, your OnDataSuite file center will never accept a non-data file such as Microsoft word or adobe PDF.