Location: Administrator>Site Settings
This screen allows TSDS business rules to be assigned by user access roles for viewing, notifying and exporting purposes.
The LEA must decide whether or not to use the TSDS Business Rules Notification Center or the TSDS Business Rules Role Access screen. Disabling one enables the other. Please see TSDS Business Rules Notifications for further information about that process.
Please note, if utilizing the TSDS Business Rules Role Access functionality, user access roles should already be built prior to utilizing this screen. See User Access Roles for more information.
To turn on the TSDS Business Rules Role Access functionality, you must first enter the Administrator>Site Settings>TSDS Business Rules Notification Center screen.
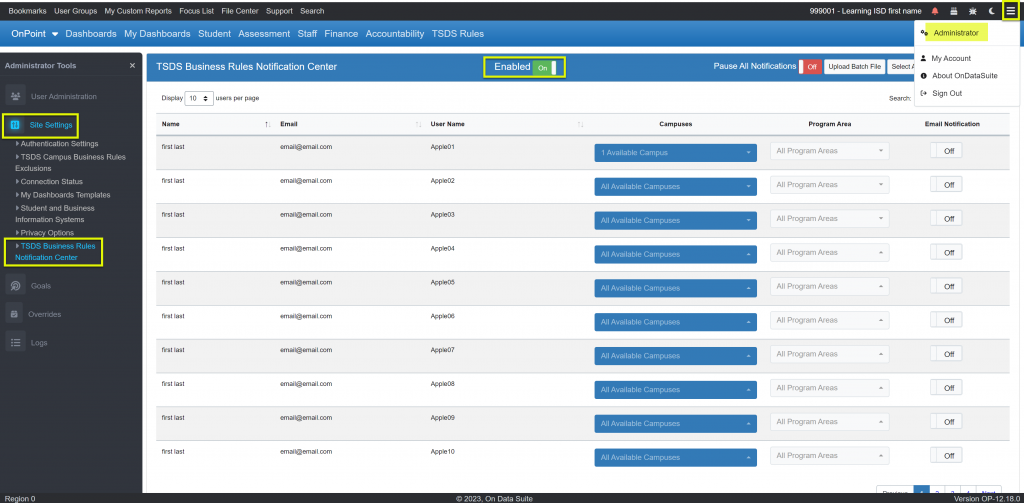
In the blue heading bar, click the Enabled from On to Off. This will change the screen to a Disabled status and you can then click on the blue bar to go to the TSDS Business Rules Role Access screen:

After entering the TSDS Business Rules Role Access screen, you will notice on the left hand side of the page that you can now navigate straight to the screen under Site Settings
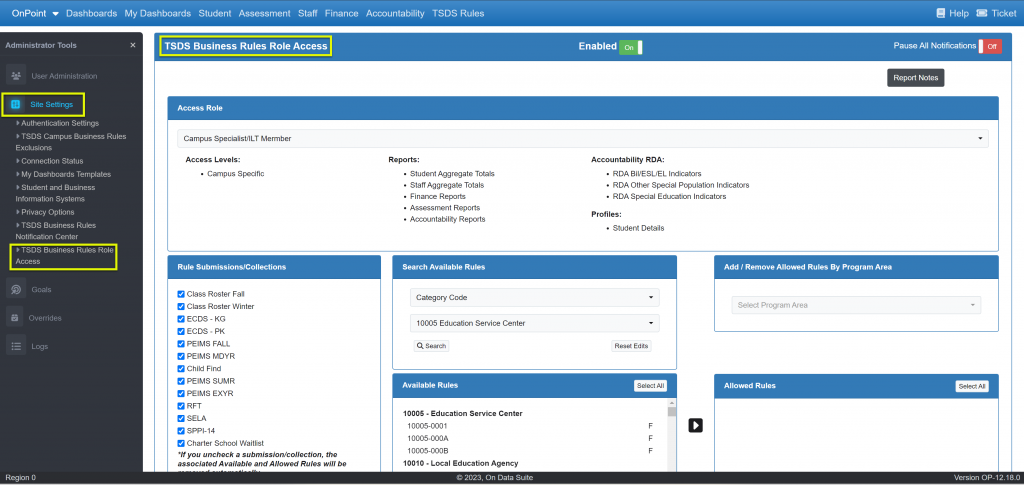
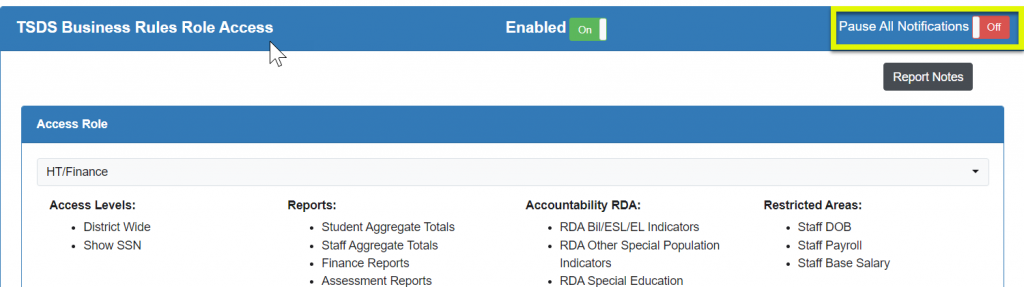
Next choose the appropriate Access Role for editing

- Access roles should already be built prior to utilizing this screen. See User Access Roles for more information.
Sections:
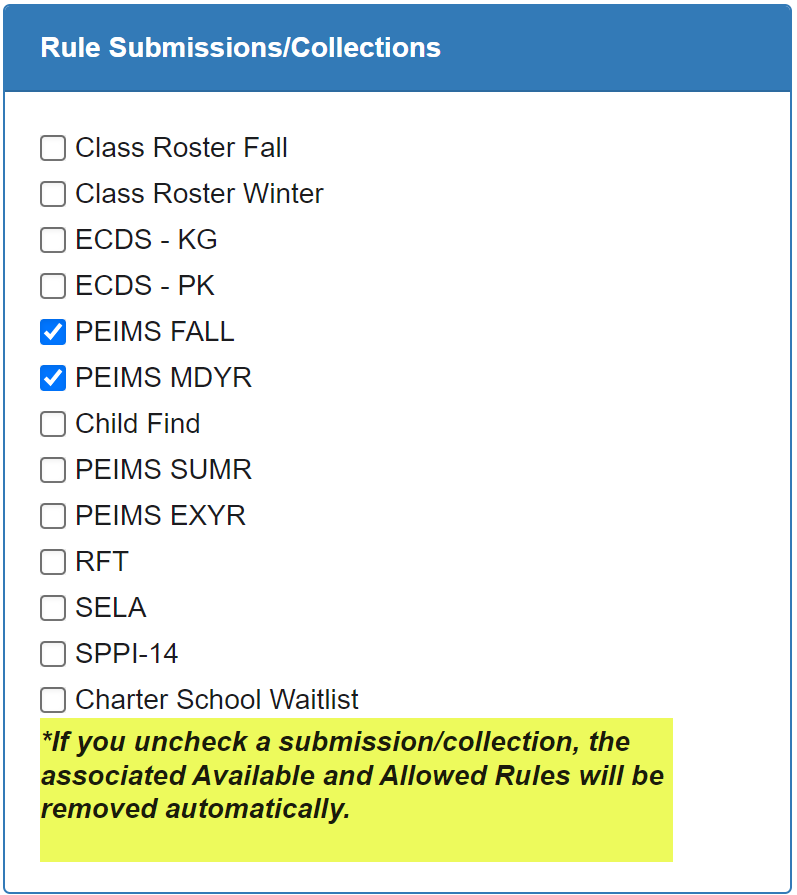
- Rule Submissions/Collections – Designates which TSDS Rules will appear under both Available and Allowed Rules
- Note: This does not control the access for which TSDS Rules category can be viewed, exported, or receive notifications. It is purely used for displaying rules under the Available and Allowed Rules sections. In other words, if you choose PEIMS Fall and move all of these rules to the Allowed Rules, every submission/collection that contains those rules can be viewed, exported, or receive notifications.
- Available Rules – Allows rules to be selected and moved to Allowed Rules depending on filter selections

- Search Available Rules
- Allows searching by specific Category Code, TSDS Rule #, Error Type, or Description to display applicable rules under Available Rules
- Click “Search” once criteria selected to show applicable rules under the Available Rules section
- Click “Reset Edits” to return to all Available Rules allowed according to the Rule Submissions/Collections filter
- Note: If using Description, try to input as much as possible and ensure it matches the TSDS rules wording
- For example, if searching for At Risk information, enter AT-RISK-INDICATOR-CODE which is found in the language of the TSDS rules
- If you search by description for something found in many rules, for example SPECIAL-ED-INDICATOR-CODE, processing time increases and has the potential to time out in the web browser
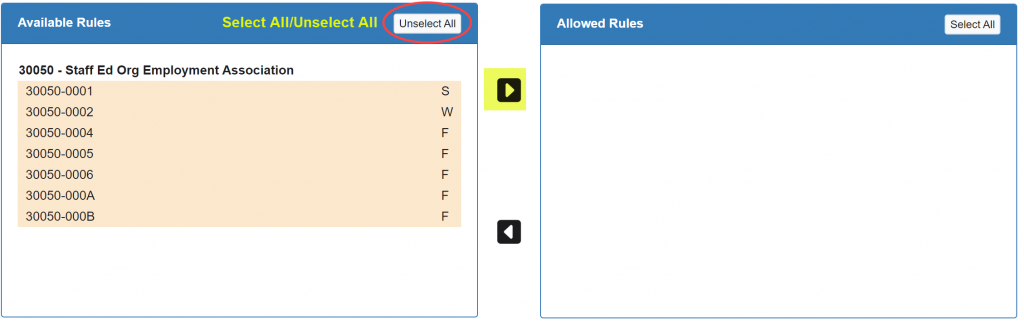
- Available Rules
- Use the “Select All” button to highlight all of the Available Rules or click on rules independently
- Use the right arrow to move the highlighted Available Rules to the Allowed Rules
- Note: Once this action occurs, the role automatically has access to the Allowed Rules
- Allowed Rules – These are the TSDS Business Rules the selected Access Role will be able to view and export to Excel, and if turned on, receive email notifications.
- Note: The TSDS Campus Business Rules Exclusion screen overrides the Allowed Rules for a campus level role.
- See kb article: TSDS Campus Business Rules Exclusions for further details
- Note: If an Allowed rule spans across multiple submissions/collections, the rule will appear in the TSDS Rules for all categories regardless of what is checked under the Rule Submissions/Collections section which is only used to display the appropriate rules.
- Note: The TSDS Campus Business Rules Exclusion screen overrides the Allowed Rules for a campus level role.
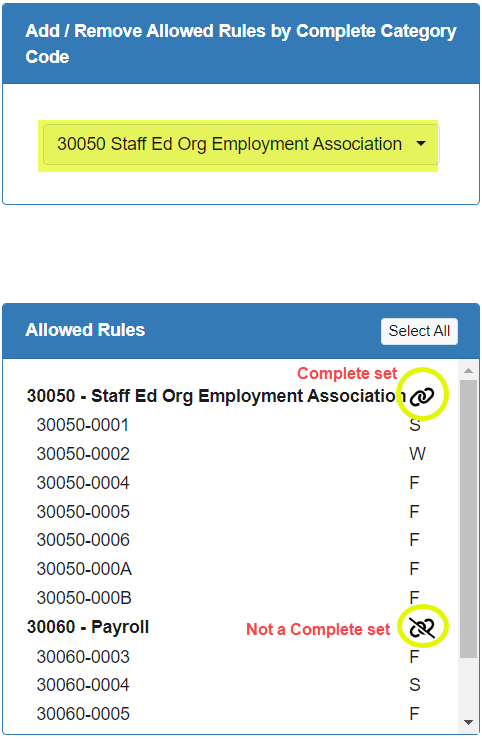
- Add/Remove Allowed Rules By Complete Category Code
- Select/deselect to add or remove a complete set of TSDS rules based on Category Code
- Note: If a Category does not have a full set of the TSDS rules in the Allowed Rules section, you will not be able to deselect that category code in the dropdown.
- Select/deselect to add or remove a complete set of TSDS rules based on Category Code

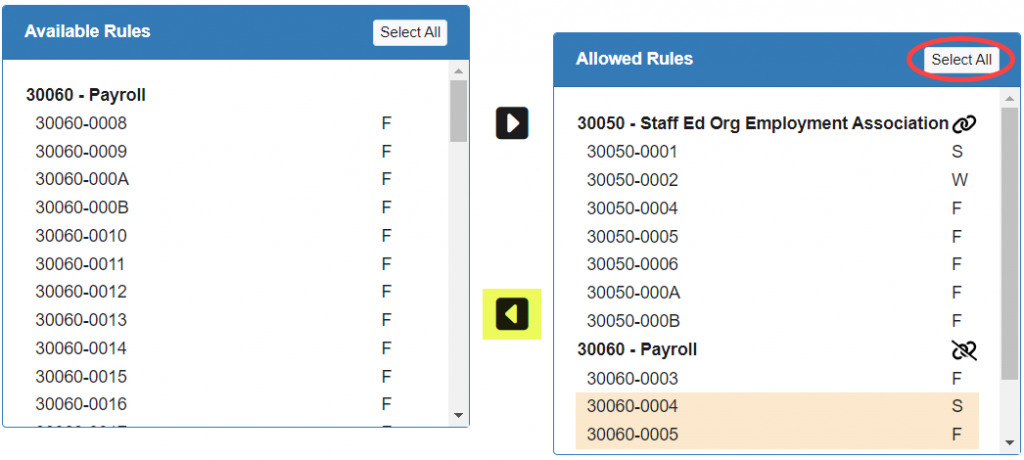
- Allowed rules
- Use the “Select All” button to highlight all of the Allowed Rules or click on rules independently
- Use the left arrow to move the highlighted Allowed Rules to the Available Rules
- Note: Once this action occurs, the role no longer has access to the Allowed Rules
- Rule Description & Details – Displays the TWEDS terminology associated with the last rule clicked in either Available or Allowed Rules

Determine if an email notification should be sent when uploaded files trigger any of the Allowed Rules for a role