The Summer PEIMS TSDS interchange files must be uploaded into the file center in order to review the data.
- These TSDS Summer PEIMS xml interchange files can either originate from the SIS, (recommended) or the csv s can be retrieved from TSDS.
Log into OnDataSuite using Chrome as the browser.
Uploading Summer PEIMS TSDS Interchange files
- Go to the ‘File Center’ link located at the top of the screen in the black menu bar.
- Click on the ‘Data Sources’ link located in the black sub-menu bar.
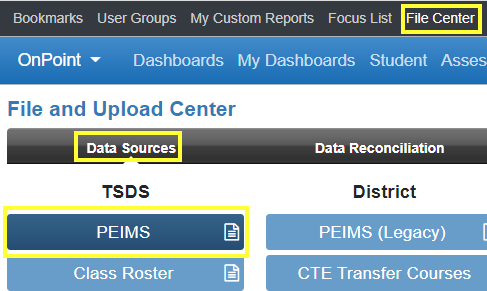
- Select the PEIMS blue button
- Use the green “Click to upload PEIMS files” tab to browse to the Summer TSDS PEIMS interchange files created by the Student Information System (SIS)
NOTE: User must have access to load files in order to see the upload tab

- Browse to either a zipped (not password protected) or unzipped file.
- Make sure the file type is “All” at the bottom right of the browse screen.
- Select ALL interchange files to be loaded at once
- The order does NOT matter.
NOTE: Subsequent file uploads will completely wipe and replace all files currently loaded for this submission/year.
Select upload “options”
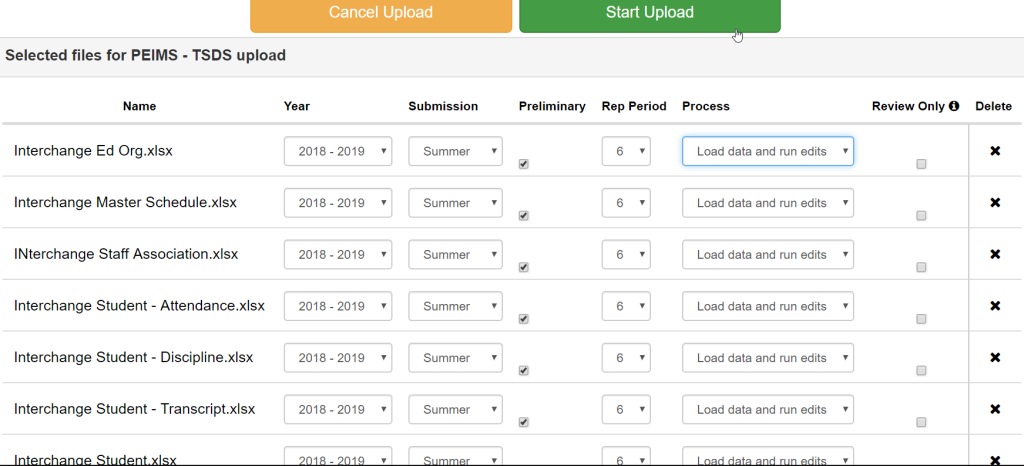
- Upload labels/options:
- Year = 2023 – 2024
- Submission = Summer
- Preliminary =Flags the file to remind users that changes are to be expected. If unchecked, file will be labeled as “Final”.
- Reporting Period – Available only for Summer files to indicate how many six weeks of data are included in the file.
- Process
- Load data and Run Edits – data will be applied to all reports and the edits.
- Run Edits Only – data will only be applied to edits portion of the system.
- NOTE: You may Load two Summer PEIMS files if they are “loaded” differently!
- First upload a file for “Load Data & Run Edits”
- Next upload a file for “Run Edits Only”

- Delete – a specific file before processing.
START Upload
When the file upload process is complete, the system will automatically combine all interchange files into 1 Summer PEIMS file and parse the various elements to the appropriate tables.
Review Uploaded File(s)
Scroll toward the bottom of the screen to view a list of all the files that have been uploaded by Submission and date. The file status will show final or preliminary according to the selection made when loading the file. The administrator that uploaded the file is also listed.
Locate the Info or Edits icon located to the right of the file
This shows the interchange files that have and have not been loaded.
“Not Found” – interchange file was not included in data load
“Dependency error” – part of the data for the interchange file is missing
- User may rename the file using the “Edit File Name” tab at the top right
- User may change the status of “Final/Preliminary”, as well as the number of 6 weeks included in the file using the “Click to change file status tab” at the bottom left.