- Associated Instructional Materials
- Video: How to Modify User Accounts
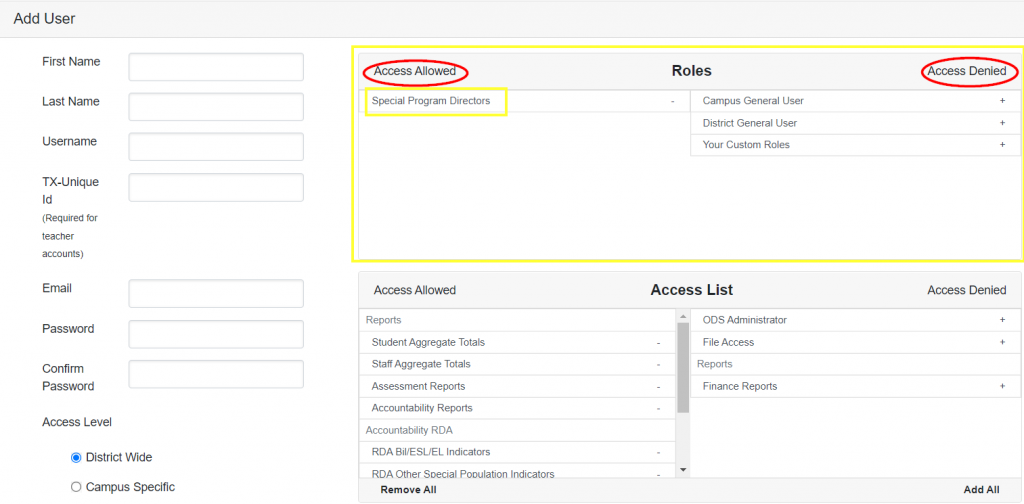
This screen allows you to build an access template based on user roles that can be applied on the Add User page.

To Add a Role
- Click + Add Role and choose a Role Name
- Click Create

- Choose the appropriate Access Levels, Access List items, Campuses, and Restricted Areas items and click Save.
- Note: If creating a Campus Specific role, you can leave the Campuses section with no campuses and assign the appropriate campus once you go to the Add User screen.

- At this point, you can go to the Add User screen to assign the role created.
Note: If a user is assigned multiple roles, the highest level of access will be authorized. For example, if they are given a role of campus level user and another role of district level user, the district level user will be utilized.
To Change a Role
- Simply select the Role that needs to be modified, make the appropriate changes to the Access Level, and click Save.
To Delete a Role
- Select the Role and click Delete

- Click Yes to delete or No to cancel

System Administrator’s Guide to User Account Setup Crosswalk
The following supporting documentation has been provided to support administrative setup of users within the system
This guide is designed to assist System Administrators in optimizing user account configurations within OnDataSuite.