- Associated Instructional Materials:
- Video: How To Make a Focus List
Use focus lists to isolate a group of staff or students in order to look at the data pertaining to them more specifically. Please note that focus lists are static the moment they are created and new file loads will not update students/staff on the focus list.
Creating:
- Option 1: From a generated “list” of student or staff names, locate the “Focus List” tab just below the title of the report.

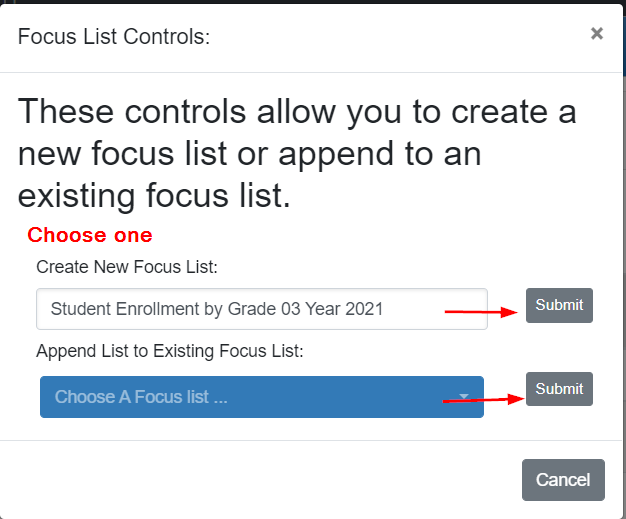
- Create New Focus List
- The title may be edited
- Select Submit
- OR
- Append List to Existing Focus List– This feature will add the students/staff to an already existing focus list
- Browse to a current focus list
- Select Submit to add
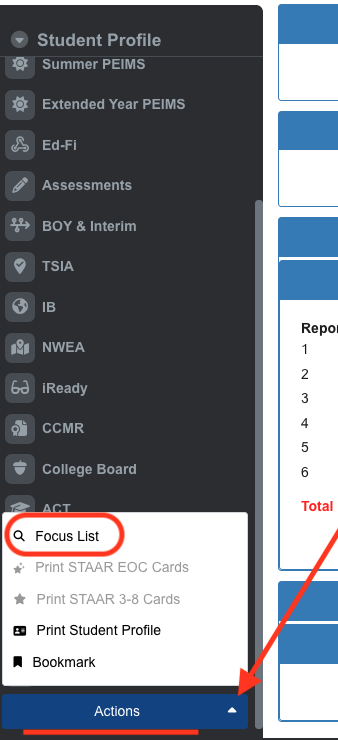
- Option 2: From a student’s profile dashboard page, locate the “Focus List” section at the bottom left corner
- Option 3: From the ‘Focus List’ tab (top black menu bar), use ‘Upload Focus List’ to upload a list of TX Unique IDs, Local IDs or SSNs.
- Step 1: Use the drop down to select ‘Focus List Type’:
- Student
- Staff
- Step 2: Use drop down to select ‘ID Type’:
- TX Unique ID
- Local ID’s (Student Only)
- Social Security No.
- Step 3: Title focus list in ‘Focus List Name’
- Step 4: Use ‘Browse’ to find file and ‘Upload’ to load IDs to the data entry box
- NOTE: The file to be uploaded should be a CSV file
- Step 5: Data Entry Box
- Update IDs loaded from CSV file if desired
- and/or
- Type IDs into the blank box with commas separating each number
- Tip: Use for small focus lists
- Update IDs loaded from CSV file if desired
- Step 6: Create Focus List
Utilization:
An ad hoc report may now be created using a Focus List in the Report Center for Student, Assessment, or Staff. The report will ONLY pull data for the staff/students on the Focus List.
- Select a Focus List from the Focus List drop down box.
- Then, create report as usual. (Select Category/Criteria)
Some custom reports also have the option to choose a Focus List as the data source.
Staff/Student Overview tab on Profile– access to profile student or staff details required.
- A Staff or Student can be added to or removed from an already existing focus list from the Staff/Student profile Overview tab.
- The Profile Overview will also show any focus lists for which this person is a member.
Locate:
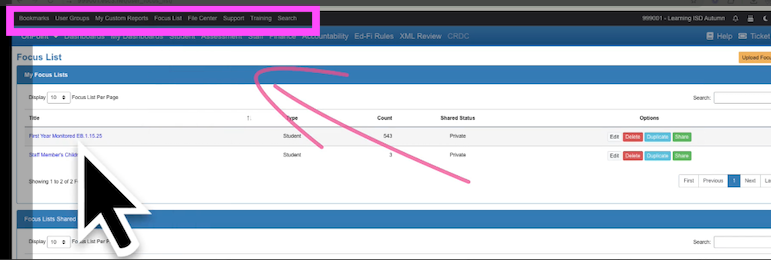
To find a complete listing of the focus groups created, select “Focus List” from the black menu bar.
From here, options include:
- Upload Focus list:
- Add new members to a Focus List
- Upload a Focus List manually – (see above)
NOTE: Click on the title to display members of the Focus List