Starting with 2024-2025, CSV files should be loaded after final submission to TEA
The following TSDS Interchange files are required for Class Roster (prior to 2024-2025 when Ed-Fi replaced XMLs):
- Interchange Education Organization Extension
- Interchange Master Schedule Extension
- Interchange Staff Association Extension
- Interchange Student Parent Extension
- Interchange Student Enrollment Extension
Note: If you are pulling some interchanges from your SIS and other interchanges from your BIS, as long as they are all uploaded in the same batch, OnDataSuite will merge the files.
HOWEVER, with the exception of the Interchange Staff Association Extension file, OnDataSuite will not accept 2 of the same interchange/extension files, in an effort to “add to” the data, like TSDS does. You may remove an interchange/extension, from your file set (zipped), and replace it with a newer, updated interchange/extension, and then upload the whole batch to update only part of the data.
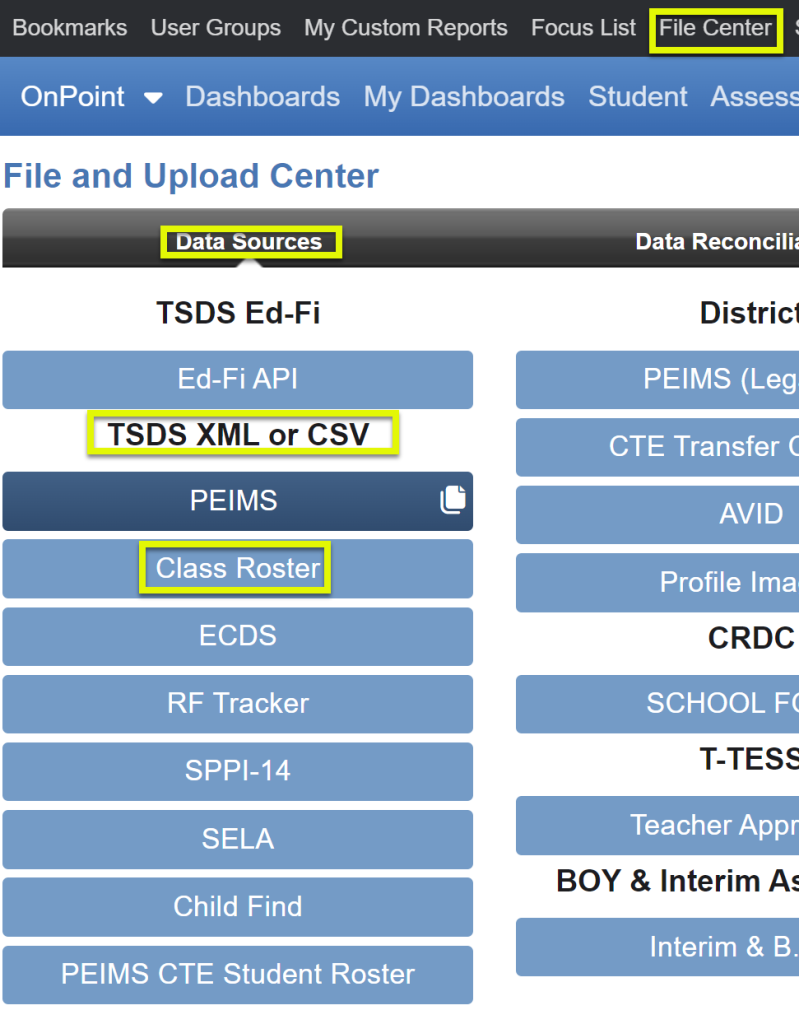
Click on the green upload button to upload the interchanges (must have administrative rights).

- Browse to either a zipped or unzipped file. Make sure the file type is “All Files” at the bottom right of the browse screen.
- If zipped, ensure interchanges are directly in the zipped file and not in a parent folder within the zipped file.
- If unzipped, select all files, the order does not matter.
- Click Open after selecting all interchange or zipped files.
- File(s) will be sent to File Center to prep for loading.
- Select the appropriate
- Year
- Submission
- Class Roster Fall
- Class Roster Winter
- Preliminary
- If checked, Preliminary column will state “Yes”
- If not checked, Preliminary column will state “No”
- Does not affect data in any way
- Process
- Load data and run edits – data will be updated in the database and applied to all reports and the business rules.
- Run edits only – data will only be applied to business rules portion of the system (no updates to the database).
- Load data Only – data will be updated in the database and applied to all reports except for the business rules (depending on size of file, could save significant time).
- These processes can be run without files replacing each other
- They all will be stored in the history area below
- ‘Run edits only’ files will have an indicator on the far-right hand side labeledEdits
- ‘Load data only’ will have an indicator labeled Data

- Click the green ‘Start Upload’ Button
- OR Click the black X to delete file(s)
- OR ‘Cancel Upload’ to completely stop the upload process
- When data load is complete, scroll down to view all the files loaded.
- Click on the Info, Edits, orData link, far right-hand side, to see process information including interchange files or CSV files loaded.
- Submission CRF = Class Roster Fall; CRW = Class Roster Winter
- Click to change file name under “Edit file name” section if desired
- Click on the Info, Edits, orData link, far right-hand side, to see process information including interchange files or CSV files loaded.
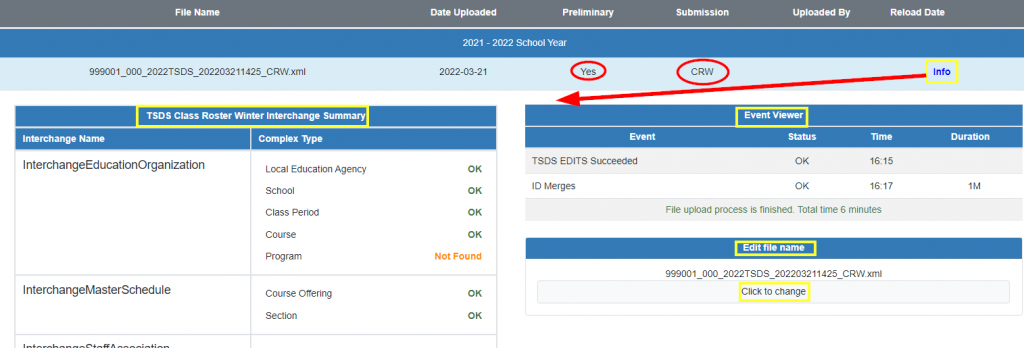
Best Practice: If loading XMLs, verify all interchange files loaded OK. If not, recognize the missing data may affect certain reports requiring the associated data.
Note: While a file is loading, you may continue to work throughout the rest of the system, including file uploads for other areas.