- Associated Instructional Materials
- Video: How to Modify User Accounts
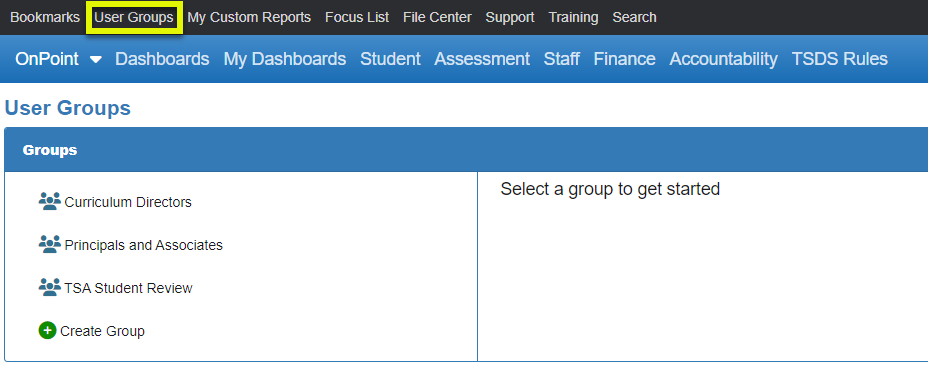
Location: Top black menu bar
User Groups are used in conjunction with Bookmarks to share reports with multiple users at once, for example, principals or registrars.
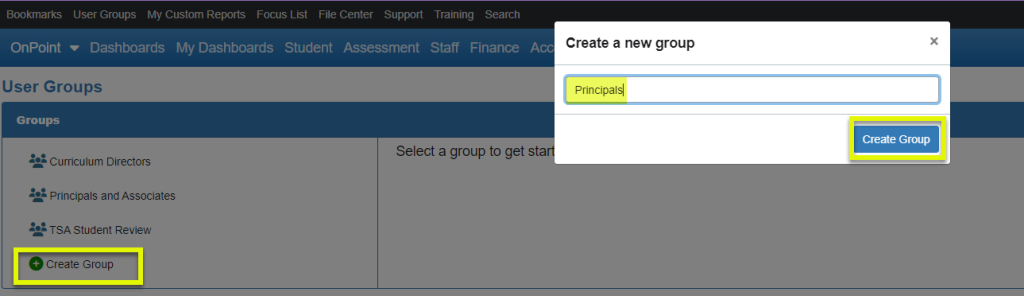
- Select the Create Group button and enter a title for the new group in the box. Be sure to click Create Group.
- Next, click on the group, left-hand side of screen, and then drag and drop user names from the Active Users box to the Group Members box.
- Message will display, top right-hand side, that member has been added to the group.
- Group members added will receive a single email with all bookmarked reports that they have available to them via sharing. The user who added the group members will also receive a cc email with the bookmarked reports for each user.

- To remove a group member, simply do the reverse, drag and drop from the Group Members box to the Active Users box.
- Message will display, top right-hand side, that member has been removed from the group
- To delete a group, scroll to the bottom of the screen, and click on the Delete Group button.
- To edit the group name, click on the Edit Group button.

Best Practice: Once the group is complete, go to Bookmarks and use “Share” tab to locate the user group(s).
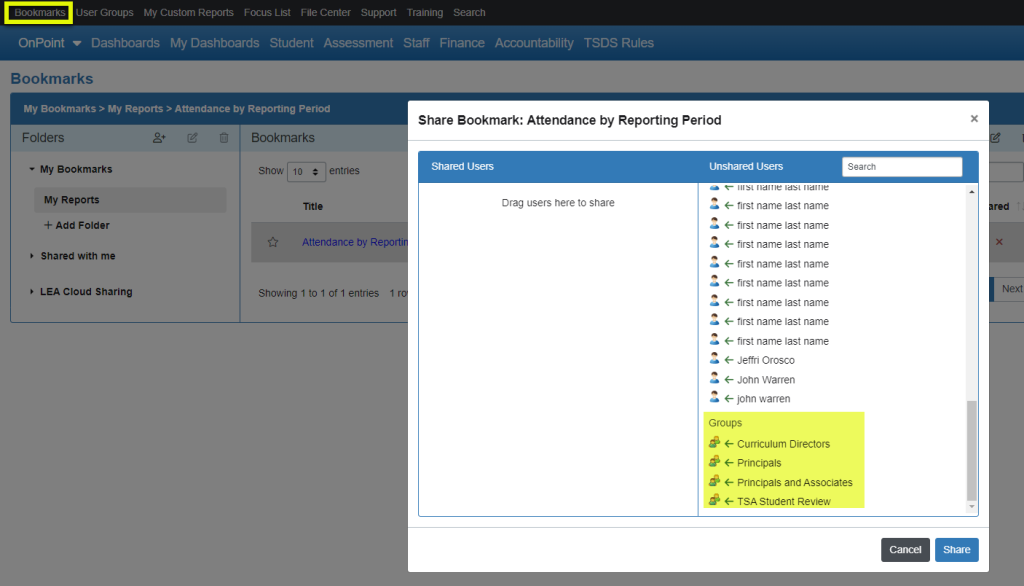
NOTE: Upon moving the “User Group” to Shared Users, everyone included in this group will have access to the report consistent with the user’s account permissions.