Column sets provide the ability to save column values for future use without having to go through the entire ‘add columns to a list’ process. Because every returned list will contain different column values this process provides a way for the user to save groups of columns to be used during the process of future column additions.

Step 1. Adding New Columns
Typically users will need to first add new columns to their initial list.
This process is covered in this KB article
https://kb.ondatasuite.com/knowledge-base/column-options-how-to-add-columns/
Step 2. Saving Column Sets
After specific/new columns have been added to a list, users can then select all or some columns that they wish to use for future sessions. To do this, you must be in ‘column options’ mode. To be in this mode just click on the ‘Column Options’ link above your list that contains the column sets you are going to save.
While in column options mode you should see all of the columns available for saving. You will need to select the check box for each column you are wanting to save into a column set.
Note: There is an option to check the topmost ‘select all’ check box at the top of the list but it is not recommended that new users attempt to use this feature as it will cause duplication of fields when used in future report builds.
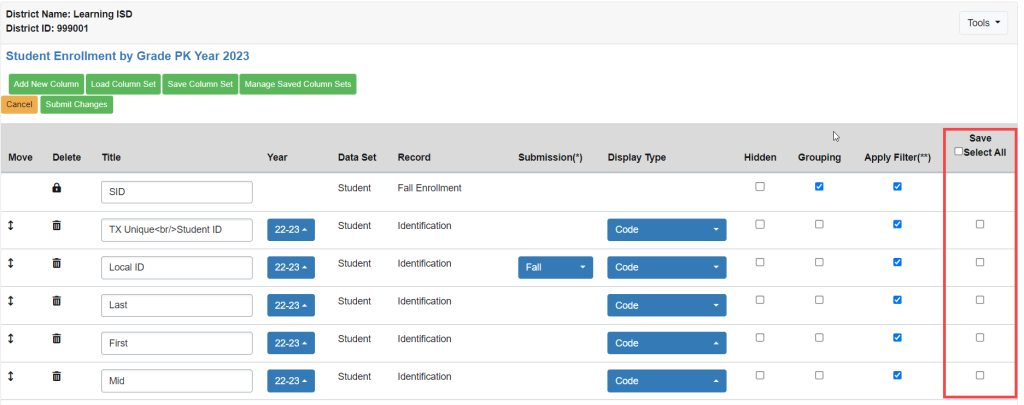
After you have checked the boxes of all the columns you want to save as a column set, you will now need to click the ‘Save Column Set’ button and a popup screen will appear. After you complete the process click on the save button and you will receive a secondary pop-up screen confirming your new column set has been saved. Before saving, make sure to review the prompt items listed below:
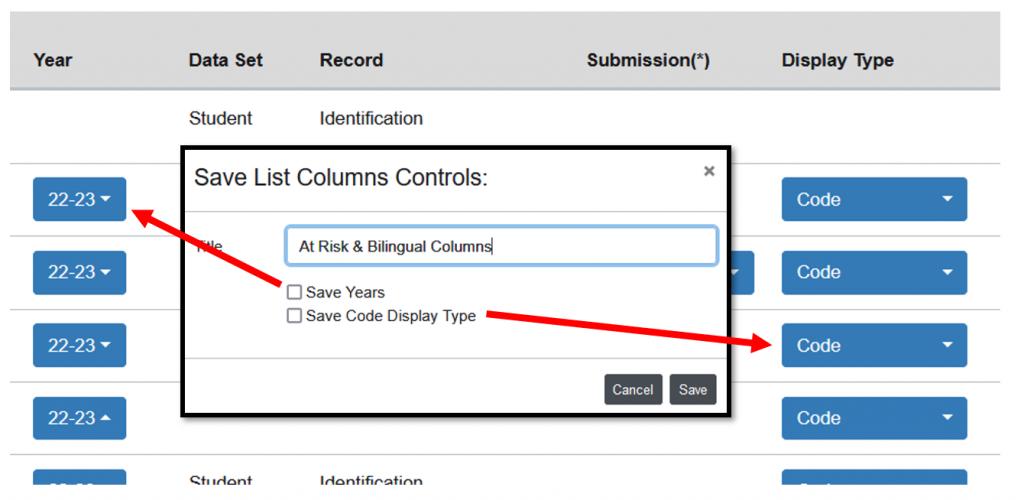
Title: Defaults to the current associated list name. You may title this something more appropriate or relatable to the column set you are creating.
Example: We have added two columns from our PEIMS table to show the At-Risk and Bilingual Status of a student that can be applied to any list in the future so we titled the column set as ‘At Risk & Bilingual Columns’
Save Years: Defaults to the current associated list date range. If you are planning on using this in future reports that use a different base date search, you will not want to use this feature. If it is not selected, it will change with the base report selection of each report.
If left blank, when the column set is used in other reports, it will adhere to the base year selection of each report but if ‘save years’ is selected, the selected year range is the only year that will be reported when using this column.
Save Code Display Type: Will default to last saved column option display type selected for field.
Image of relation of pop-up save selection options in relation to column options
Step 3. Loading Column Sets
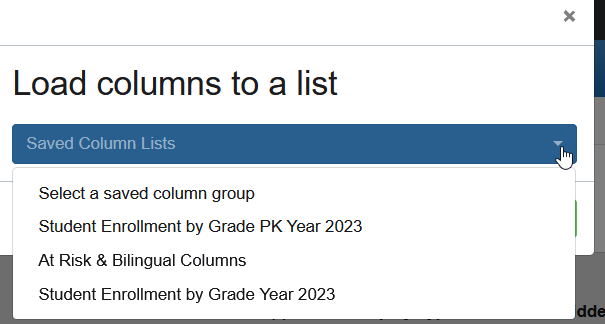
After you have created a column set as explained in step 2, you will now be able to use your saved column set in future column options sessions be clicking on the ‘Load Column Set’ button which, when selected, will show a pop-up screen of your available saved lists.
Simply find your saved column set from the list and then click the green ‘load’ button to add these columns to the bottom of the column list you are working with.
Step 4. Managing Saved Column Sets
This option is used when you want to delete/remove a column set.
WARNING: This will permanently delete your saved set and does not provide a prompt.